Editing wildlife photos for different uses
Editing wildlife photos for different uses

Quick links
Edit 1 – Competitions • Edit 2 – Social Media • Edit 3 – Printing •
Edit 4 – Portfolio • Final Images Reveal • Join William On Safari
Editing wildlife photos in Adobe Lightroom and Topaz DeNoise
William Steel, professional wildlife photographer and Pangolin Photo Host based in The Chobe, Botswana, talks us through how to edit wildlife images during post-processing in four different ways, as editing for competitions varies greatly from editing for print. Let’s dive in!
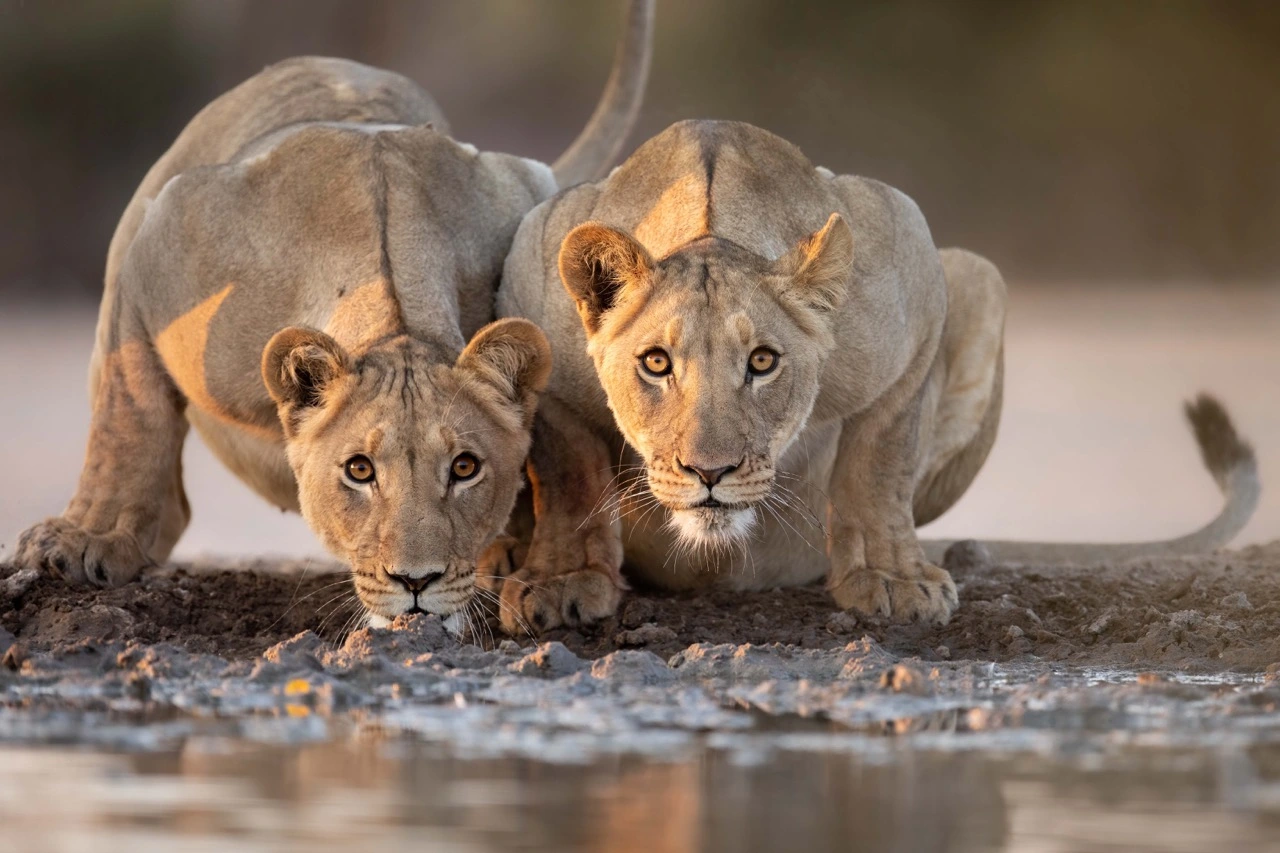
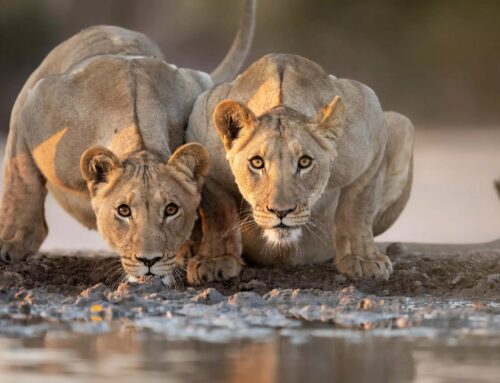
In my previous blog, I showed you how to select the best wildlife images from a sequence using the reject tool to colour and star rating. As a result, we went from 500 images to just one – a dream for all wildlife photographers! In this blog, I will show you how to edit this image in four unique ways for every different occasion.
I am going to cover my top tips and tricks to edit the same image for competitions, social media, to hang on your wall and finally, for your portfolio. I am sharing my advice for using software programs Adobe Lightroom and Topaz DeNoise to edit and clean up the image.
New to Lightroom? Check out Janine’s FREE beginner course below.

First, let’s look at how we would edit this image for competitions. As many wildlife photographers know, most competitions have strict rules regarding what is and isn’t allowed with editing. Therefore, checking each competition’s rules before entering is always good, as they often differ.

Because most request raw images airing on the side of caution is often advised with a competition edit, the first thing I do when editing all photographs is to crop and align. I’m hoping to achieve a more uniform composition and a level image here. It is already a tight crop, so I want to make sure that the spacing on either side of the lion is roughly the same. I’m using the eyes as a reference to find the alignment level.

Once we have done that, I want to move down to the basics panel. Most of the general editing we will do will be done here. Before you start playing around with the sliders, it is good to take a moment to look at the image, deciding what you want to achieve before you begin.
As I adjust, I work my way down these sliders, testing what looks best. I like the exposure of the original image, so I slightly lower it to bring more attention to the highlights. I personally don’t use the contrast slider as I prefer to have more control. Instead, I use the highlights, shadows, whites, and blacks to finetune these contrasts working through them until I find a balance I like. The photograph was taken in the perfect early morning light, so by adjusting these four sliders, I’m simply trying to emphasize the beautiful soft lighting.
Once I’ve made the general changes in the basic section, I like to use the masking tool for more area-specific edits. First, brightening up the eyes a little, like with the general edit, I’m adjusting highlights, shadows, whites, and blacks. But make sure you don’t overdo it, as it can look unnatural.
Next, I want to make the lions pop just a little bit more. So I go into masking again and click the select background. I love Lightroom’s sky, subject, and background masking select options as they save you so much time.
Because I want to blow the background a little, I’m going to subtract some of the highlighted areas in the same depth of field as the lion so it blends in better. I then adjust the clarity and texture. Yet again, don’t overdo this with most edits. We’re trying to amplify what is there, not create something that wasn’t.
I also just want to make sure all the viewer’s attention is to the eyes and the face of the subject. So I go in with a brush again and simply increase clarity slightly. And that’s it in Lightroom.
Now I just want to export this image to Topaz DeNoise for a final touch-up. Once you have added Topaz DeNoise as a plugin, you can simply right-click on the image, go to edit it and select Topaz DeNoise AI. Because this image has very little, if any, noise, I just want to add a small amount of DeNoise, sharpen it slightly, and recover the original detail. Each image requires you to test these sliders to see what looks best, and that’s it; our first image is edited. Let’s move on to edit two social media.
Because we have already edited this image for competitions, we can select the previous edit and create a virtual copy, or in this case, synchronize the settings of the prior edit.
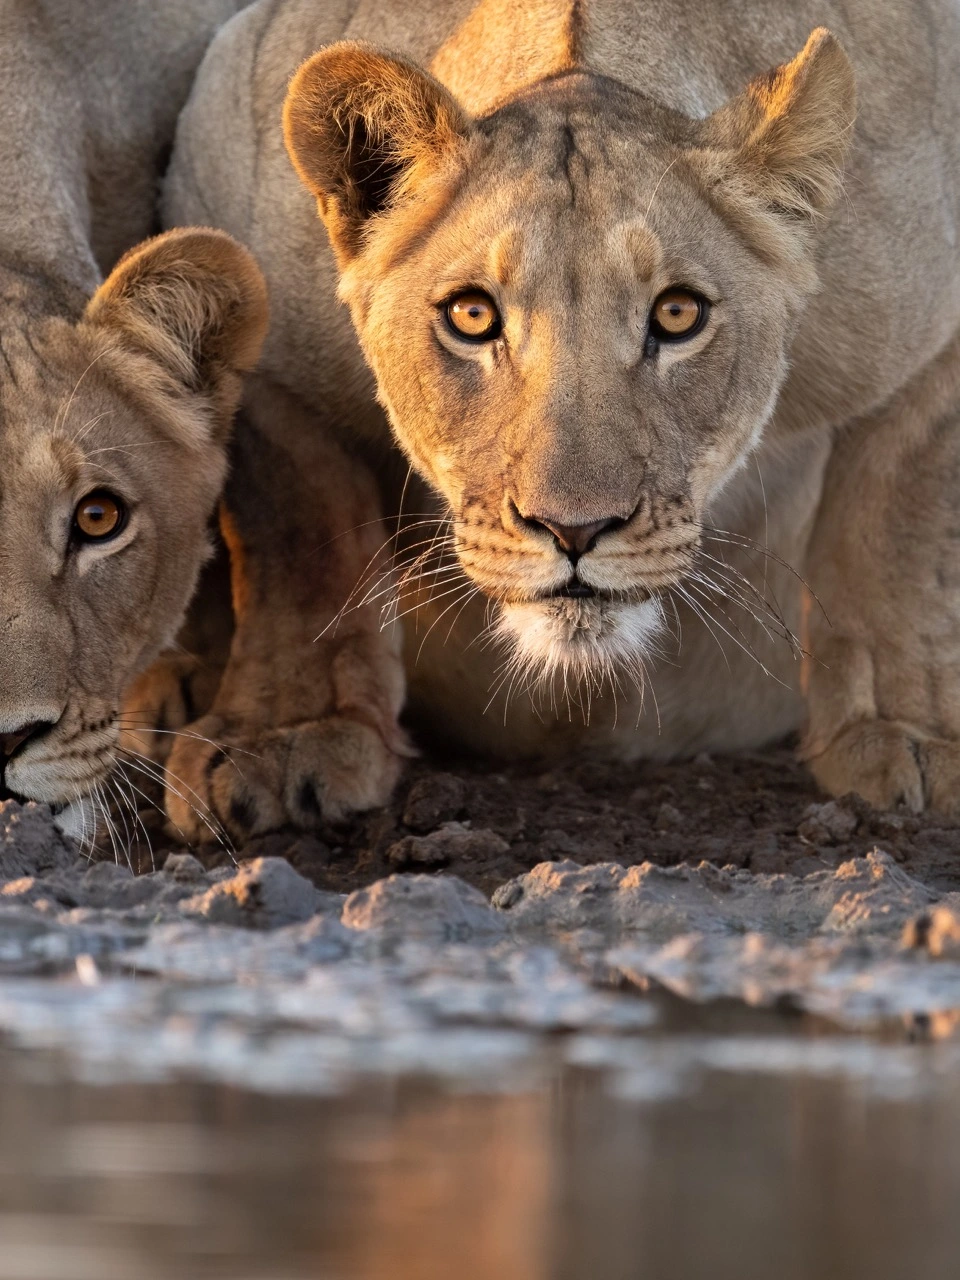
We do this by selecting the first edit, then the current image, and clicking sync at the bottom of the editing panel. We can also include all the masking and cropping edits we made as well. Once we have done this, I want to crop the image differently for social media. Because most people will be viewing this image on their phones, we really need the image to stand out, making sure the subject fills the frame. We want to search for a composition that works best because apps like Instagram work best in portrait. I ended up changing to a four-by-three crop ratio.
Because we copied over the previous edits, we simply have to tweak them to fit this new crop. However, one thing I did want to do was draw even more attention to the lion on the right. I did this by brightening the eyes slightly and softening the highlights on the face to draw the viewer’s attention to the eyes.
And it’s as simple as that. Now we just have to put it through Topaz DeNoise for those final touches; because we do not need to be so subtle for social media, I increased the noise reduction and sharpened it a little bit more to make it pop. Just make sure that it doesn’t look artificially sharpened in the face.
Edit two is done!
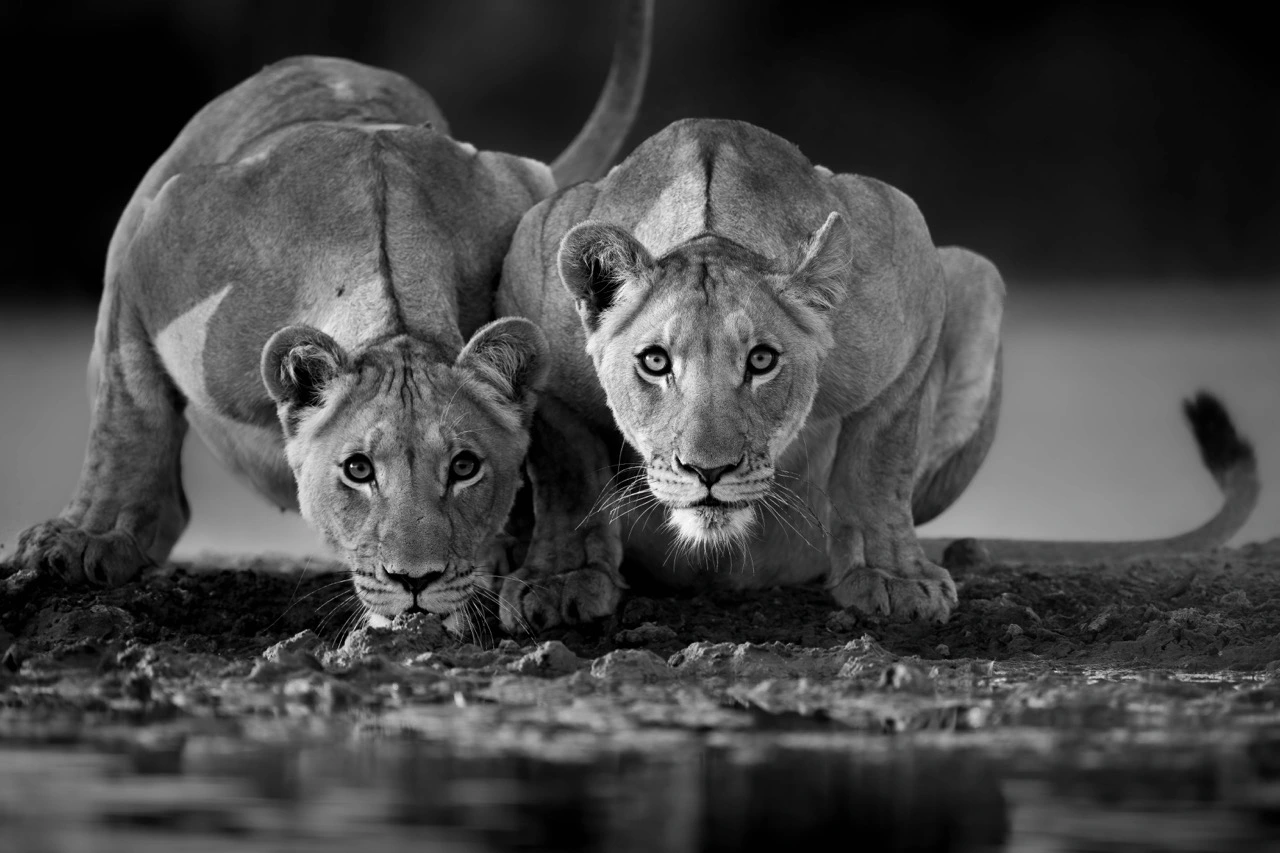
Edit number three is to print for the house; seeing your entire image up on your wall is always quite something. This is the one where we can really push the editing a little bit more. We want the photograph to be a piece of art on the wall so we can really finetune our look in post-processing. Because colour images are hard to match in your home, I want to convert this image to black and white – a dark image can always make a statement too.
I think most wildlife photographers would agree that black and white gives a much more fine art feel. Once converting, we simply go down the sliders in the basic panel like before. One rule of thumb is that black-and-white images often need more generous changes to the highlights, shadows, whites and black sliders. We really want to emphasize contrast as we have removed the element of colour.
Black and white images work best with subjects that have high contrast as it exaggerates the shapes and textures like in edit one. We then use the masking tools to make localized edits.

This time I’m using these masking selects to push attention away from the background and towards the lion. By reducing highlights and darkening shadows, we are able to focus the audience’s eye on the thing that matters — the lion.
I personally use post-processing as a way to exaggerate the visual impact of the image. While this image is more intensely edited than the other two, that is because of what we want to use the image for. As I mentioned in the beginning, it is important to go into your editing process with an idea of the outcome.
While this edit is likely too much for competition, I think it needed that extra wow factor as a print. In the first edit, I showed you how to add light to the subject’s eyes manually. You can also do this by using a mask and then clicking Custom at the top of the panel and scrolling down, and selecting Iris Enhance. You can then increase or decrease this with a slider.
The image is looking good, but I want to make a few final tweaks. I reduce the highlights on the lion’s face so it isn’t overpowering. I reduce the clarity and texture of the background to make the lion stand out. I darkened the foreground with a graduated filter. Add a vignette, making sure that it is subtle and not obvious. And lastly, use the brush tool to reduce a few highlights and lift a few shadows.
And that’s it. Let’s put it through DeNoise, much like the first edit. We just want to subtly add a layer of sharpening and reduce noise. And there we have it. Edit number three. Would you hang this print on your wall? Let me know in the comments below. Want to know more about editing in black and white? Check out this blog, where I discuss this in more detail. Last but not least, edit number four for your portfolio.
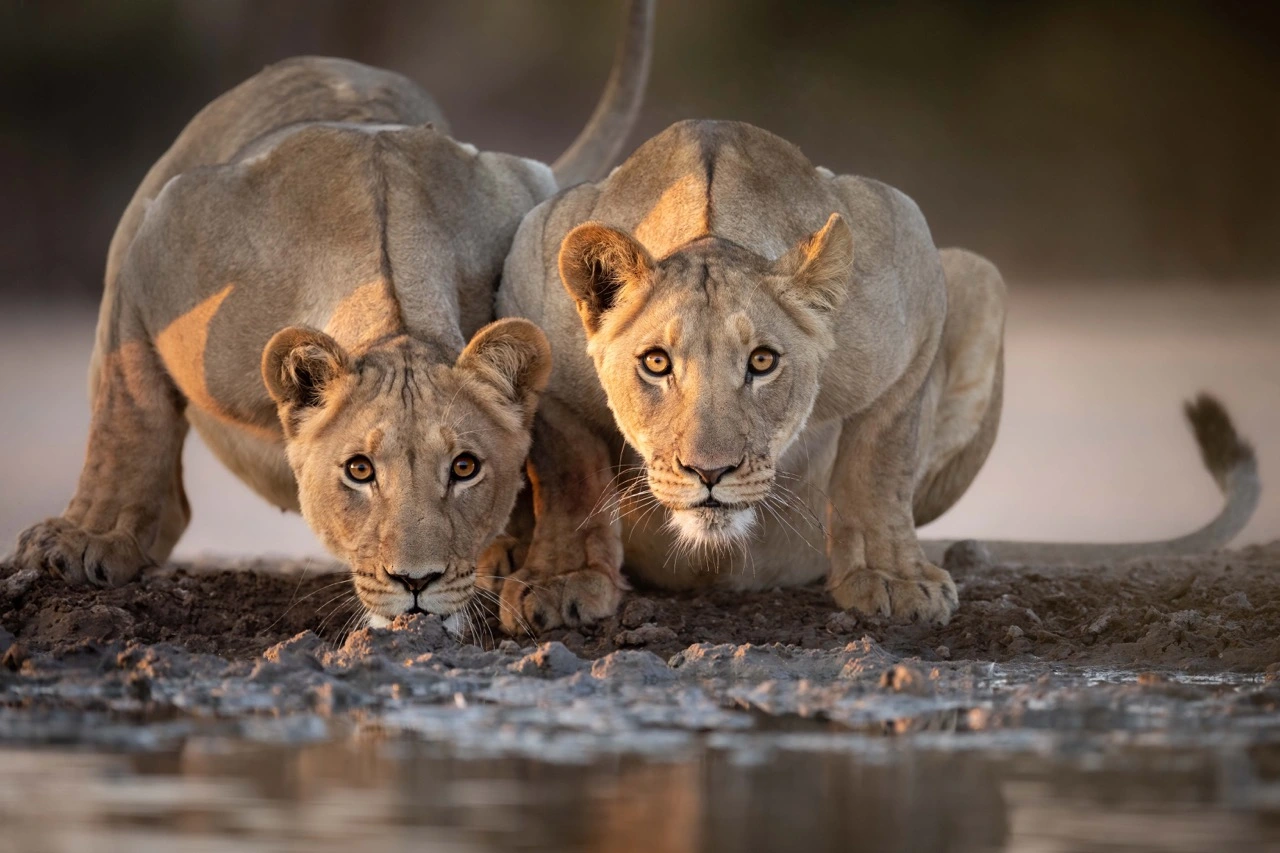
Because our portfolio image will likely be very similar to our competition image, I will again synchronize our edits from the first image. The only difference with the portfolio is that we do not have to be as strict about our editing rules.
This image is all about that wow factor. So my focus is on getting rid of all the distractions and blemishes we discovered through the last three edits. Using the healing tool, I go in and get rid of any issues, from small marks to distracting colours that I see in the scene.
I also exaggerate some of the previous masks, like adding more sharpness and light into the eyes, as well as bringing more light into the dark, distracting areas of the frame. Now for the final step, let’s bring it into DeNoise for the cleanup. And that’s it. Now all that’s left is to reveal the final result, and here they are.

What do you think? Did you learn something new about editing images for different purposes? Let us know in the comments below. Want to learn more about wildlife photography? We’d love to have you join us on safari – check out our trips!
Leave A Comment