Photographing birds in flight
Photographing birds in flight

Quick links
The essentials • Managing your background • Photographing birds flying straight towards you
Practising at home • Camera settings • Shutter speeds • Birds in flight – Getting Creative
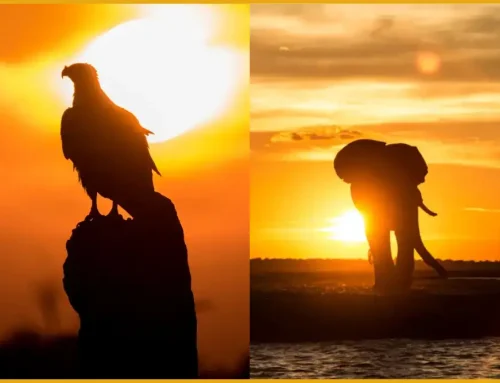
Birds in flight often make for some of the most beautiful photographs, as you’ll see below. We’ve compiled this blog to share some of our favourite tips and tricks on how to get the most out of these opportunities.
Of course, a lot of this also has to do with your natural environments like lighting conditions, background, wind direction, and the flight path of the bird. What is important though is knowing your camera, being comfortable with your settings, and especially understanding your focus system. Don’t forget to brush up on your knowledge of the birds you plan to photograph.
There are a lot of different elements and styles when photographing birds and more specifically flight photography. The videos below will go through various focus points on bird behavior and more.
First let’s cover gear, settings and composition tips for photographing birds.
When photographing birds, often your background plays a huge role in the composition and overall aesthetic of your photograph. Pangolin Photo host Danielle Carstens shares some useful tips about how to effectively manage your background and how to make the most of the environment you’re in. From bright blue skies to lush foliage, there’s something to keep in mind for every scenario – find out more in the video below.
Now that you’ve got the basics down, Guts Swanepoel, co-owner of Pangolin Photo Safaris, talks us through how to photograph birds flying straight towards the camera. From shutter speed to bird behavior, this video covers it all.
So we’ve covered a lot already, but let’s talk settings for birds in flight! Firstly, if you’ve made the switch to mirrorless you’ll already notice the improved tracking and autofocus abilities. However, some good basics to keep in mind are:

ISO: 100 / APERTURE: f/5 SHUTTER SPEED: 1/1000
DEPTH OF FIELD
As with most wildlife photography, the aim is to keep the eye of your subject sharp (unless of course, you are trying something more artistic). When it comes to birds in flight, it will be extremely difficult to get the entire bird pixel sharp – that’s okay though!
So try to shoot birds in flight around f/8 or f/9 to give yourself enough depth of field so that both the bird’s head and body are sharp. This works well for birds in the sky as you don’t have to worry about blurring the background – once you’re more comfortable try play between f4 and f2.8 and see how you feel to give you a more shallow depth of field and better bokeh background. It’s all a bit of an experiment but keep your focus point on the head and see what distance works for you and your specific style for flight photography. Here is our guide on depth of field in wildlife photography.
EXPOSURE
It is important to really be comfortable with the triangle of shutter speed, aperture and ISO when it comes to birds in flight. Exposure settings will always be a bit of comprising – your environment will always be different depending on the light, time of day, heat, cold and etc. Not to mention bird behaviour!
So again, it’s trial and error and a whole lot of patience. But, the general idea is to think about what type of image you want to get out of the situation. Is it the perfect identification of certain birds in flight or are you going for something more artistic when you photograph birds in flight?
So to cover the basics, your shutter speed will determine if a fast-moving bird in flight will have some sort of motion blur or if the entire bird will be sharp. What you settle on for the aperture will determine your depth of field and how much light you will capture in dim conditions.
Lastly, your ISO simulates the exposure of your image and this heavily relies on your shutter speed and aperture to get the photograph correctly exposed.

One of the most common questions we get asked when it comes to shutter speed is what works best. Slow shutter speeds or fast shutter speeds? The answer to this truly lies in you as the photographer and what you want to accomplish with your photos.
Firstly you want to take a few moments to think of the composition of your flight photos. Now in order to really get the image you want you to need to know a little about the bird biology, bird behavior and what should be the focus point for these flight shots.
While many birds will be behave the same it does change between small birds and large birds and their wing positions for example. This is where sometimes really knowing your autofocus system comes into play.
When setting up your photos, you can either go for a high shutter speed which will freeze the motion of the birds in flight or you can really slow it down and show the movement of the bird’s wings. As the photographer and with a little artistic licence, you can slow things right down to create movement throughout the entire image. However, you really still want to focus on the eye of the bird to create a focal point in the blur.
When it comes to flight photos and deciding if you want a fast shutter speed or not, your conditions really do determine the flight shot. Especially when looking at light – for example, a slow shutter speed tends to work very well for low-light situations.
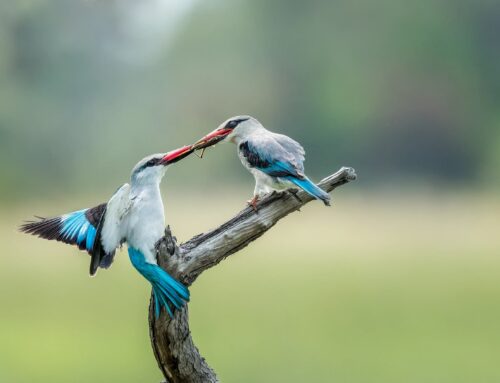
Also, you need to assess what the birds are doing and the species’ behavior. Are they shooting fast across the sky and you only have them for a brief moment in good light or are they hovering in the air like hummingbirds or kingfishers and you have a hard time getting their wings in perfect focus? As we mentioned in the videos, focus on the background too. Are they going after insects in the trees or flying into their nest or are they great birds of prey flying with a fish in their talons with their legs spread back? All these things play into the photo you are going to go home with.

So we’ve spoken about having enough depth of field and when to hit the shutter button as well as lighting and timing. But also our best advice is to just get creative!
Start with larger species of birds and try and get their whole body in focus. Then move on to techniques like panning – being able to track the bird in your viewfinder and focus your camera. If you use a big lens you might also need to get comfortable with a tripod. If you don’t use a tripod, you might need to have a steady left hand to keep things smooth while you focus on the species in the sky.

Once you’ve gotten comfortable with your camera, and lens and focusing on the birds flying or just about to fly, move on to your smaller and faster birds and how to capture them. Try and find a nest that they keep coming back to so that you can really sit and shoot – having a single point to focus on the bird will help you learn when it is going to fly and its behavior. Patience is key!
Hopefully, you’re excited to give this technique a try! Why not come and visit us in The Chobe to practice?
Join our photo hosts on safari!
Leave A Comment