How to use micro-adjustments to get sharp images
How to use micro-adjustments to get sharp images

Quick links
How to get sharp images • What equipment do you need • What steps to follow
All you need to know about micro-adjustments • All you need to know • Our safaris
Guts Swanepoel, the co-founder of Pangolin Photo Safaris, talks us through a simple camera trick to help you get sharper images in the field. In this blog, we won’t discuss slow shutter speeds or other factors about sharp images, but rather AF micro adjustment.
What made Guts want to discuss this topic? Well, after a morning out on the Chobe River in Botswana, he noticed something was slightly off with his images – particularly a little malachite kingfisher. Guts was photographing it on his lowest aperture number to blur the background completely, and as the boat drifted closer to the kingfisher, he noticed that his depth of field was becoming shallower and shallower. Guts focused on his eye, and the bird looked towards the boat.

When looking back at the images, he realised that more of the bird’s head was in focus instead of his beak. As photographers, we know that getting sharp images, or image sharpness, is vital. So what did this mean for him? His camera is facing back focusing slightly. However, it is essential to note that you also get the opposite when the camera focuses more on the front. Now, remember, this has nothing to do with a bad lens or a bad camera.
More often than not, it’s just that there is some deviation in communication between these, and while yes, many cameras have some factory tolerance built in for it, you need to make sure it’s 100% accurate to get the best image quality. How do you do this? First, you need to go and micro-adjust your camera. There are many programs out there that can do this for you. For example, Focal works very well. You can also use accurate testing methods such as the Focus Pyramid Tool or the lens alignment chart.
However, Guts will now share his favourite bush trick for micro adjustment in the field without any need for these tools!
→ Ruler or Measuring Tape
→ Of course, if you don’t have this, a book or magazine would work fine! Anything with a few increments will work.
→ A cup or something you can balance your measuring tool on to get a steep angle towards your camera.
Ideally, you’d like to set your camera up on a tripod as close as possible to the measurement tool while still being able to focus on maximum zoom and with your lowest possible aperture. You also want to ensure that your image stabilising and vibration reduction are all switched off.
Next steps
Pick a focus point on your measurement tool, and try and pick a point that is nicely contrasting and that you will remember. From there, focus on your point and take a picture.
Now the chances are you will see some issues if you’re doing this test.
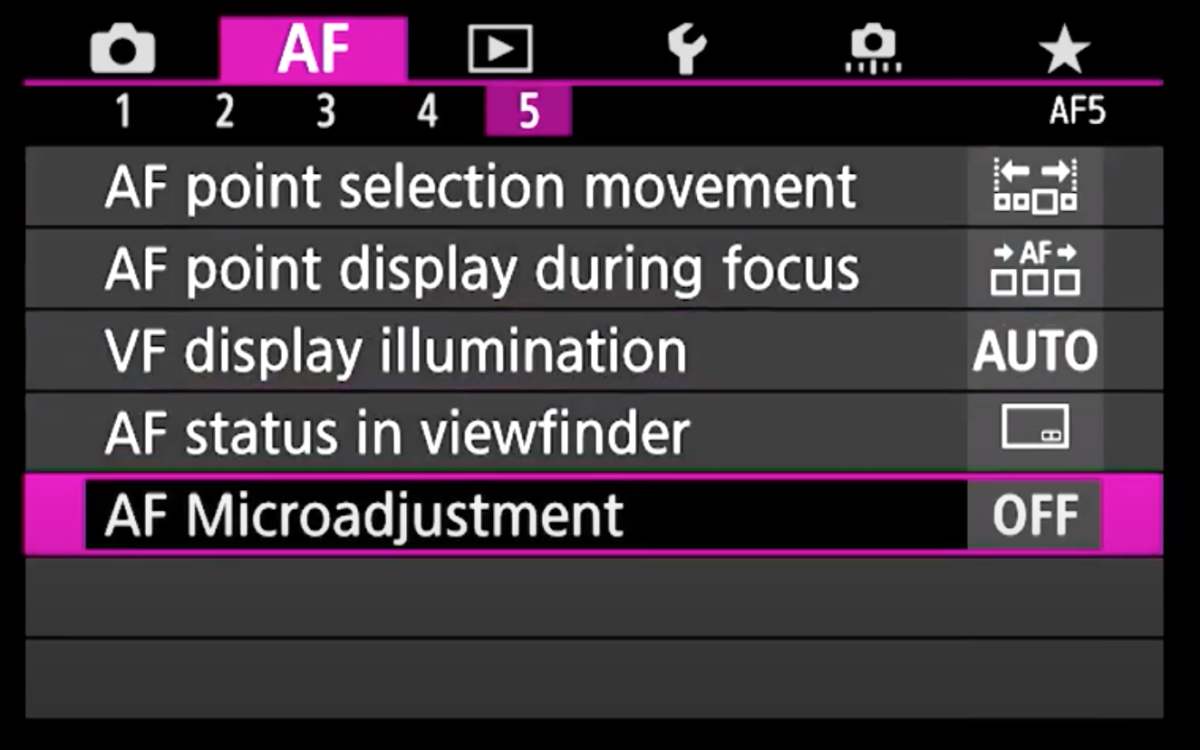
On your Canon camera:
→ Menu
→ Press the ‘Q’ button
→ Look for your purple (or pink) setting
→ Search for AF Micro adjustment
→ Click on that and go to ‘Adjust by lens.’
Note: By choosing to adjust by lens, it means that whenever you put this lens back on your camera, it will remember your micro-adjustment information.

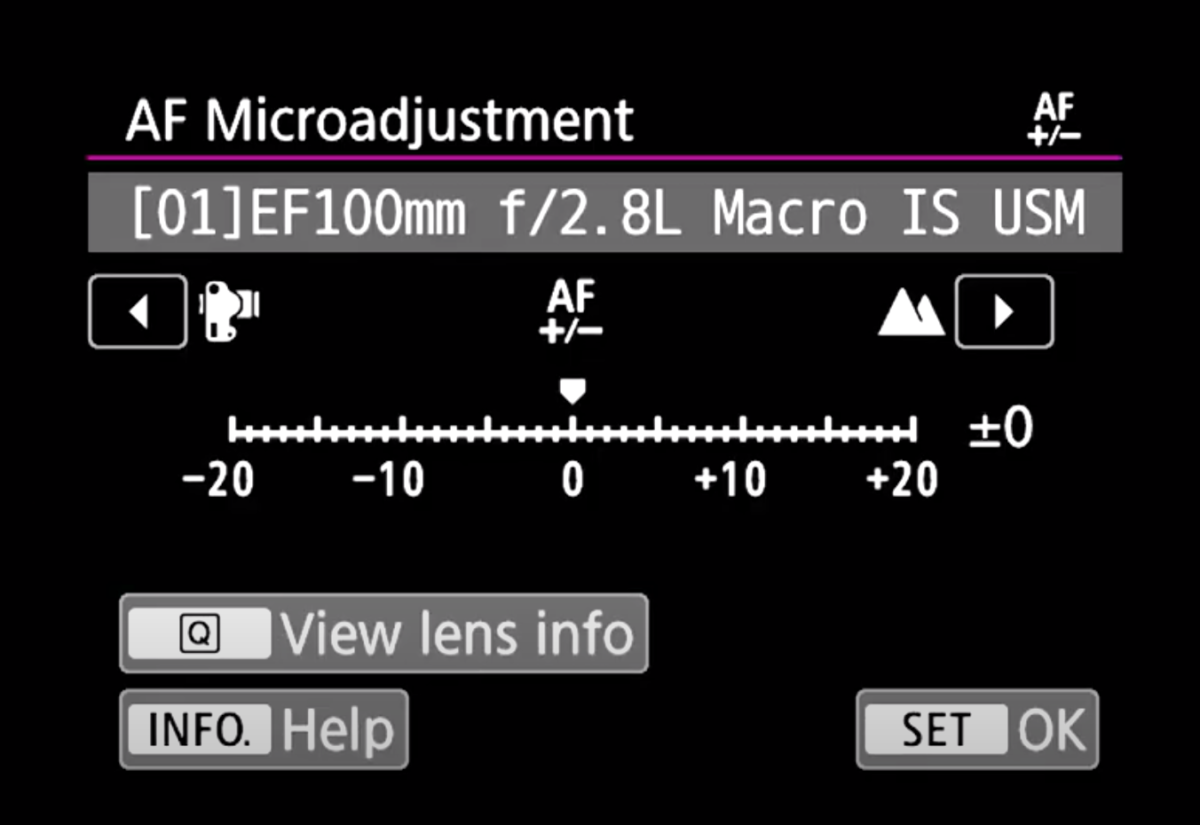

Remember to use a single focus point when testing and adjusting; otherwise, you’re just making it harder for yourself.
Make sure your aperture is as low as possible, and remember to put your camera on a sturdy tripod if you can. Ensuring that there is as little influence or camera shake from you. If you want to take it a step further, use a timer.
When you put the same lens on the camera, it will ask you – would you like to go to your micro adjustment settings? Yes. To ensure your changes are still there and your autofocus is still there.


Leave A Comment